Current version: 1.6
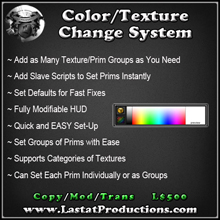
Have you been looking for a simple texture and color change system to include in your builds? One that you can set up groups of prims or set one at a time? How would you like to be able to set any color imaginable and/or use as many categories of textures as you need? Look no further, this is the system you've been looking for!
With the Color/Texture Change System from Lastat Productions you can set up groups of prims, set their default color/texture, and much more. For each prim group you can also set if the user can change the texture, color, or both. All of this customization and in a fully modifiable HUD!!
- Rez the "Color/Texture Changer" on the ground then right click it and copy the contents to your inventory
- Right click and wear the "Color/Texture Change HUD" in your inventory
- Go through your build and name each prim accordingly. The names are going to be the matches of how we set each group of them, or individually. The "Color/Texture Changer" is an examples of the naming convention used to associate the prims/groups with the buttons from the HUD
- Drag the "Color/Texture Change Core vX.X" and "Color/Texture Setter v1.1 ::" to your build. You may drag as many "Color/Texture Setter v1.1 ::" scripts to the build as you need. The more you add, the faster the prims will change (lsl limiations sleep the "Color/Texture Setter v1.1 ::" scripts 1 second for every prim it needs to set. More prims, add more "Color/Texture Setter v1.1 ::" scripts)
- In the description field of each prim, you may set its default color and texture. Do so by putting the color vector, then a comma, then the texture UUID [EX: <1,1,1>,451ac252-e968-bfe3-8620-99e0438fff5a]
- Right click and edit the HUD to bring up your build window then navigate to the Content tab
- Drag a copy of the "Texture Category" script to your inventory, then open the "*Config*" from inside the HUD
- Add the sets of group/prim names followed by a comma, then the word "Color", "Texture", or "Both" to specifiy what the user can set for this particular group/prim. Each one MUST be on a separate line AND the group/prim name MUST be less than 24 characaters long. This is case sensative therefore it MUST match the group/prim names you set in your build perfectly
- Open up the "Texture Category" script
- After "list textures = [" you will see a list of button name / texture UUID pairs. You can add as many as you like, following the example inside the script
- After you've finished adding your texture UUIDs, rename the script as you like. You MUST put the category button name between a "[" and "]". The word between those symbols will be the name of the button in the Texture Category menu. This must also be less than 24 characters long
- Thats it, your done!! You may unlink the hud if you wish and link the buttons to your own hud or build if you like.
- Click the top left box icon for a menu to choose a prim, or group of prims, to change
- Click the bottom left texture icon to choose a texture for the selected prim or prim group (if one is allowed)
- Click and hold, then drag your mouse across the color swatch until you've choose a color and hue
- Finally, click the large color area to the far right, above the word "preview", to set the selected prim or prim group